My oldest daughter is really (I mean really) into Cosplay. Usually this takes the form of dressing up as a favorite character from an animated show or video game. We’re both fans of the show RWBY from Rooster Teeth, because it has great music, a great story, and some really fantastic visuals and fight scenes. I even did an article on “Becoming The Character” for one of their characters, Sun Wukong. (I’ll be re-publishing that soon!)
One of the best parts about the fight scenes in RWBY is that they all have weapons that are both melee and powered ranged weapons, i.e. every weapon “is also a gun.” Somewhere along the line, we decided to build an actual weapon prop. I’ve been wanting to test my chops building one, anyway. After watching guys like Volpin Props and Punished Props make some amazing stuff, I wanted to see if I could pull off something even halfway impressive.
The first order of business was deciding which character’s weapon to build. Doing Ruby Rose‘s (the main character) scythe/rifle would have been doable, but it would have taken a LOT of work, and my daughter didn’t want to cosplay as Ruby (just yet). Plus it would have cost a lot to build! And it’s HUGE. If you make it even somewhat realistic looking, it will weigh fifty pounds and nearly be impossible to realistically carry.
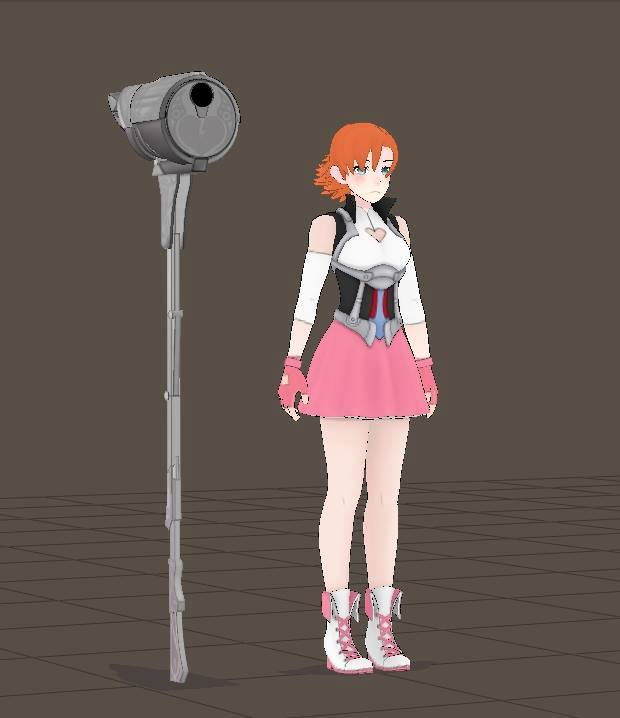
There were plenty of characters that use simple gun/blade combinations, like Blake or Ren. But those could be recreated with what are essentially just modded Nerf guns. She and I finally settled on building Magnhild (a play on the mythical Norse god Thor’s hammer) while she would dress as the character Nora. This would be both a challenge to build physically, and a challenge to use simple and/or inexpensive materials.
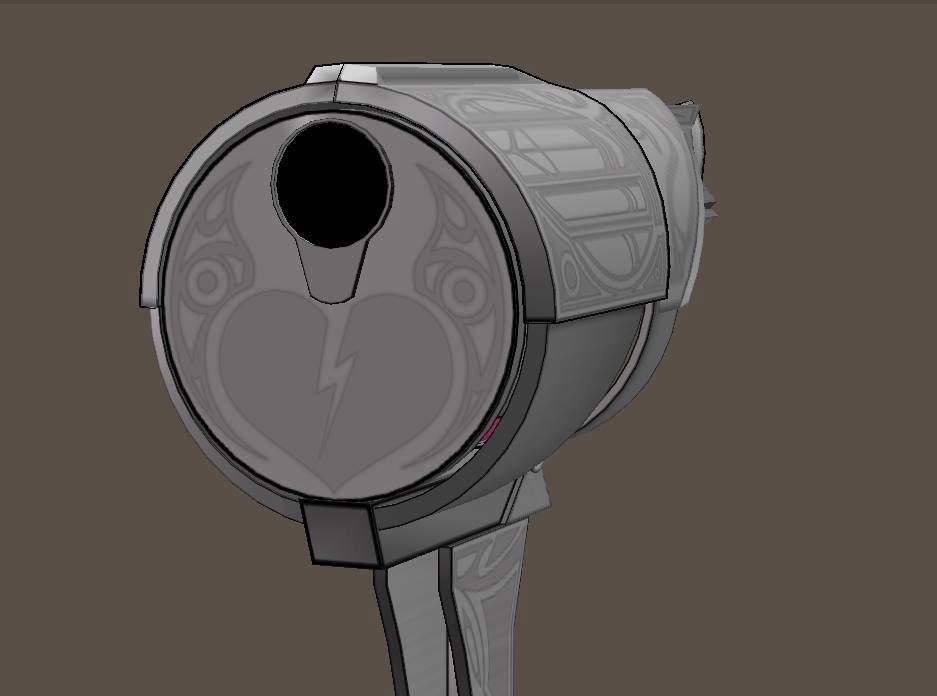
First, I had to figure out what scale this thing was going to be. According to this render from the show, and adjusting the scale for my daughter’s height (she’s taller than the character in the show), we figured out the hammer would end up being right at six feet tall if we built it to scale for it to look right.
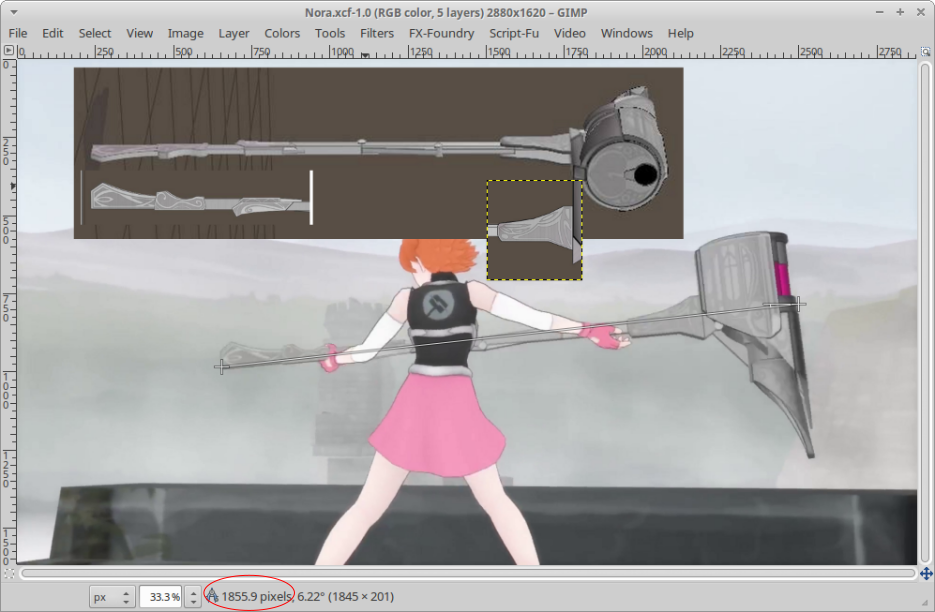
I started scrounging the internet for still shots of Magnhild in action, and thankfully, the RWBY Wiki had them in spades. With a little bit of magic and some manipulation in GIMP (a free graphics program), I was able to take some shots of the hammer at different angles and scale them to where I could measure them.
If we take six feet (72 inches) and multiply by 25.4 (converting to mm) we get 1828.8mm for the hammer’s total height. I took the best side-shot I could find, and scaled it until the total length was very close to 1830 pixels long- this allows me to just measure the photo’s pixels and convert it directly to mm. This made figuring out part dimensions easy! Just use the “caliper” tool in GIMP, and divide by 25.4 to get dimensions in inches.
This sounds very dorky, but it made actually building the hammer very easy. All I had to do for each piece was find a good shot of it, scale it so that it matched the master picture, and all the measurements worked out.
The Handle:
 First order of business was making a handle that would survive. The best thing I could find that was the right size AND strong enough was a plain old 2×4 piece of treated lumber. It was leftover from a building project- and wasn’t in the best shape. It had cracks, and one end was pretty warped. But thankfully, I only needed about five feet of it, so I cut it and started drawing out the handle shapes. This was pretty challenging, as it’s not only made up of compound curves and blocks, but it also has parts that are thicker than the rest of the handle. It was still within the size of a 2×4 (which actually measures 1.75″ x 3.75″), so I decided to use a powered hand router to thin out the parts of the handle that were thinner.
Routing the 2×4 wasn’t as easy as I’d hoped. The router wasn’t really made for that, and it kept digging into the wood. I used blocks of wood on either side of it to try to make it sit as flat as possible, which worked okay for the first side, but when I flipped it over- it didn’t work so great. I was successful in shaping it (roughly) where I wanted it, and I ended up trimming about 1/8″ from the sides. I used rasps and files to get the shape as flat as I could get it, as hand-held jigsaws tend to not cut very straight vertically. Finally, once it was roughed out, we slathered the entire thing with wood filler, and Beth spent several hours block sanding it with 200 to 400 grit sandpaper. When it was finally smooth to the touch, it was good to go.
The Head:
 After measuring the hammer’s head, we knew it was going to be about 12″ in diameter, more or less. So I started looking for cylindrical things I could use to make the “body” part of the hammer head. Pipe was too thick, and bending thin plastic would have been a lot of work. So I went through the shop looking for something close. Lo and behold, as it turns out, a standard 5-gallon plastic bucket was almost exactly the right size. Lucky us! It was going to get chopped up, but that’s okay. It would make shaping the frame much easier
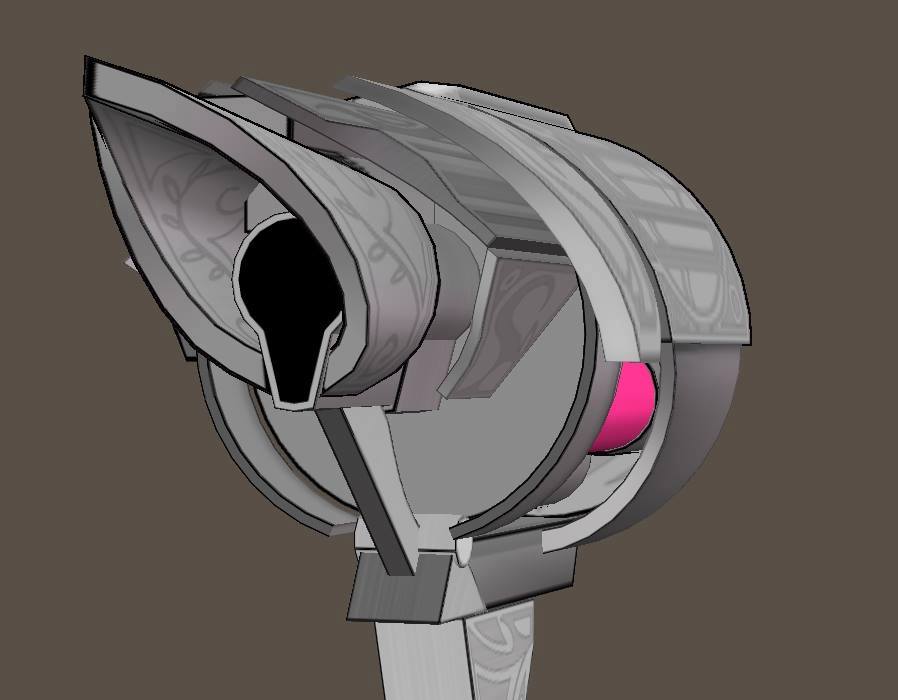
Now, those of you with good eyes will notice the head on the Prop is actually a bit bigger than the digital one. With the restrictions we were working with (i.e. the diameter of the bucket, using Pringles cans as the source of the pink cannisters, etc.) it’s very close. If I were going to do it again, I’d make it a bit smaller, but… in hindsight, it still came out pretty close.
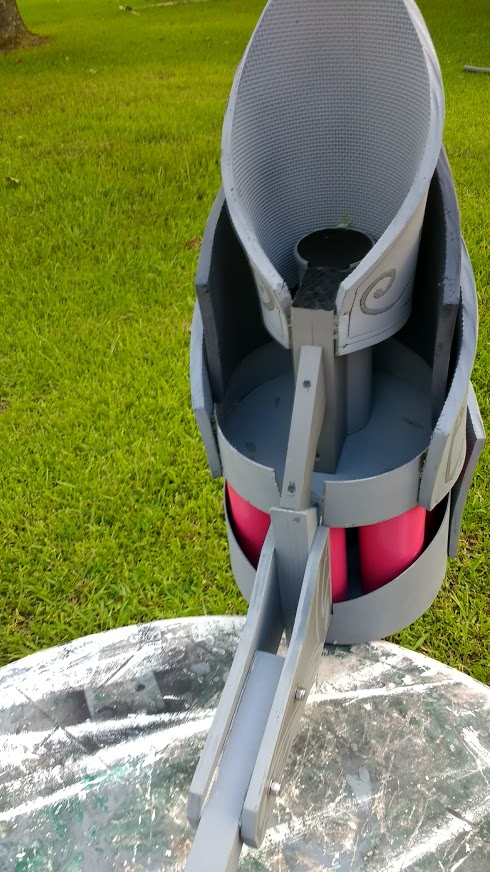
I tossed around the idea of making a keyhole-shaped can for the back of the head, but time and practicality won out, so we used a single Pringles can (cut to length) and some scrap 1×3 cabinet pine to make the basic shape. The face of the hammer is 1/2″ birch plywood (also left over from cabinets). I cut the hole in the face with a 3-1/2″ hole saw, and beveled the edge with a 45° bit on the router. That was screwed onto the “base” of the head, also made of 1×3″ cabinet pine pieces that were screwed and glued together. I used mini hinge screws to attach the 6 Pringles cans (cut to length) to the back side of the face, and a scrap piece of 1×2 and Luann (very thin) plywood to “sandwich” the cannisters.
 At this point, the hammer “face” was only attached to the bottom with two screws on the edge. So I made a small scrap to anchor the back to the base, and then we attached the last can and some pieces of 1×3 pine to the very back, or “tail” of the hammer head. Then I took the plastic 5-gallon bucket,trimmed the shaped I wanted from the top and bottom, and attached them to the head’s “frame” using tiny little tack nails. The wood pieces were joined with wood screws, countersunk into the wood so they would look nice and flush.
I made the last parts (the “plates” that join the head to the handle) out of 1/2″ birch cabinet plywood, and screwed them on to the base of the head. The handle would be attached between these plates with a couple of 1/4″ carriage bolts and locknuts. But since I had thinned out the handle, we needed something thin to fill the gap! The plates were slightly wider apart than the handle’s width, so we built up the top of the handle with- wait for it- duct tape. Yeah, plain old duct tape. About 10 layers on each side, and it fit snugly. I got 3″ bolts, and had to cut off the ends flush with the nuts, and clean them up with a mill file.
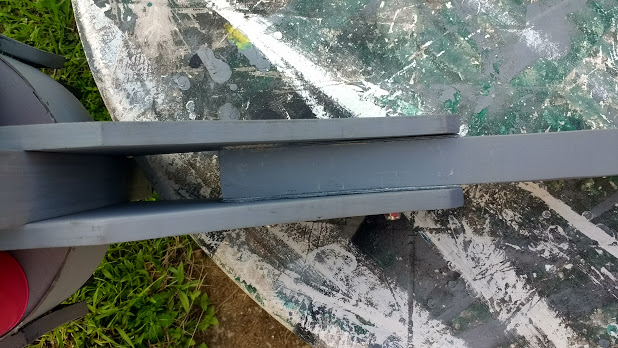
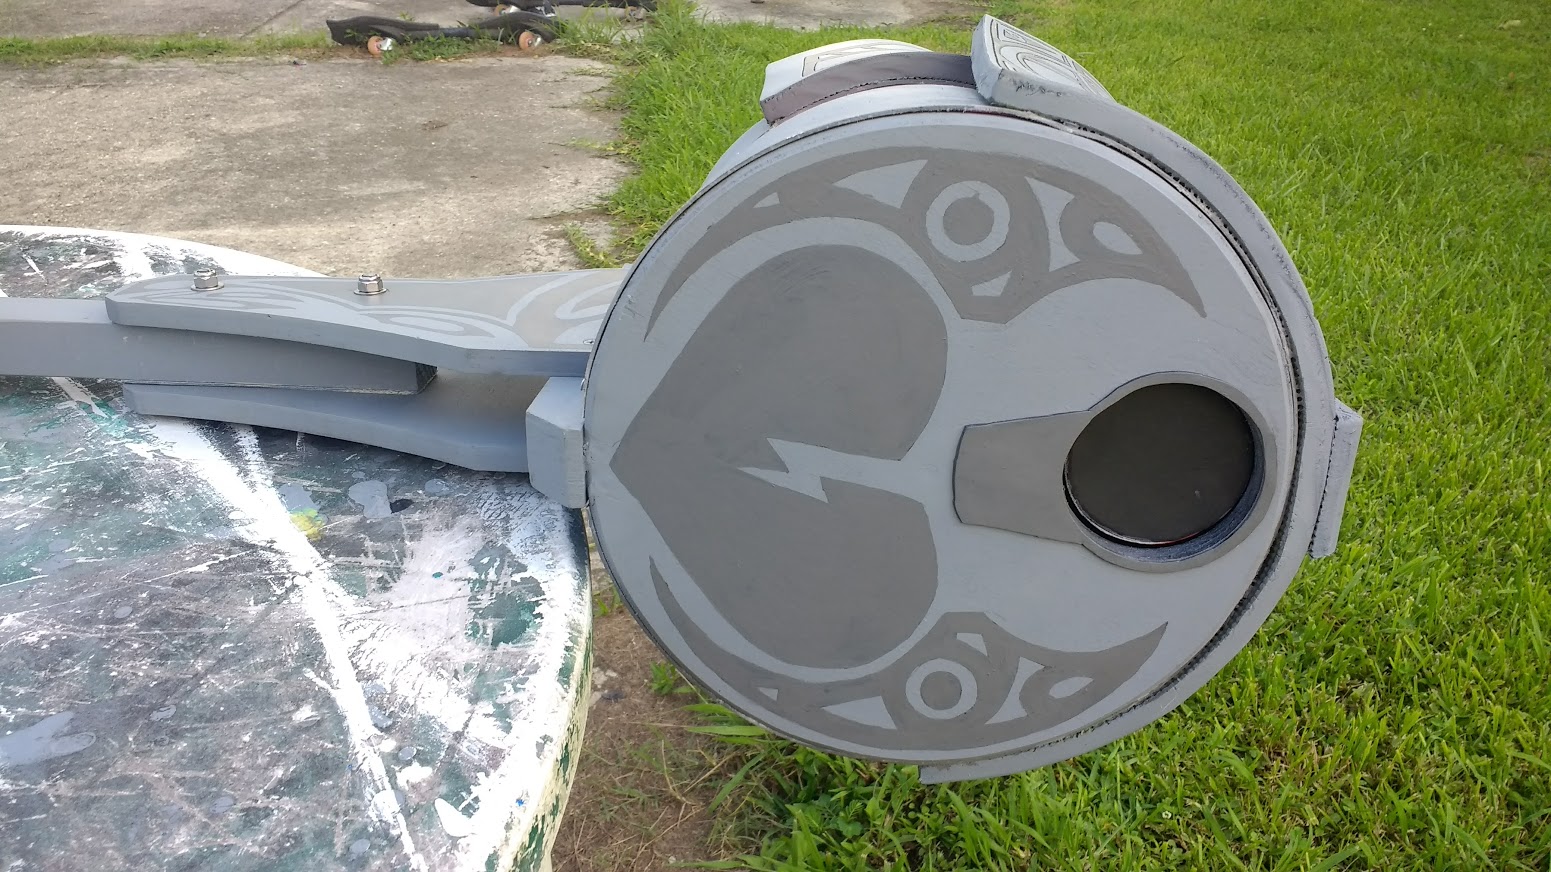
When we were finished, it looked like this:
We painted the majority of it with Krylon sandable filler/primer, which made block-sanding the handle go much faster. You can spray it on pretty thick to fill imperfections, it’s made for that purpose. Beth detailed everything with dark gray acrylic paint, by hand.
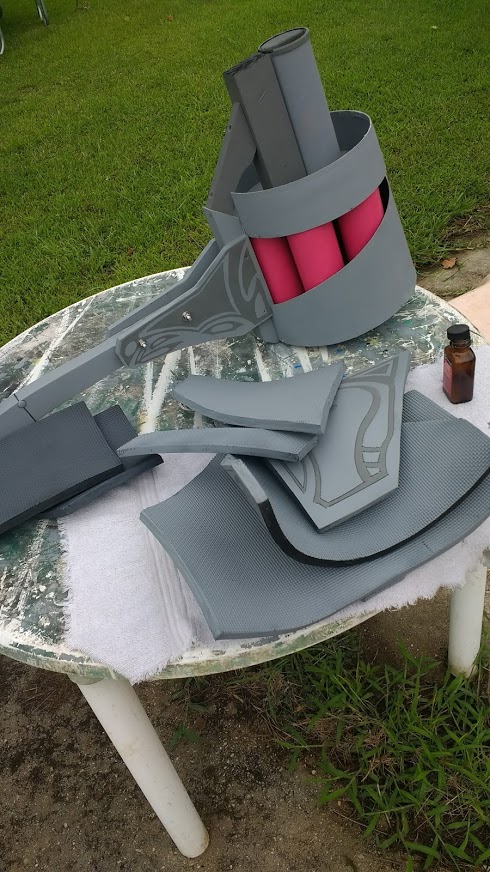
Foam Pieces:
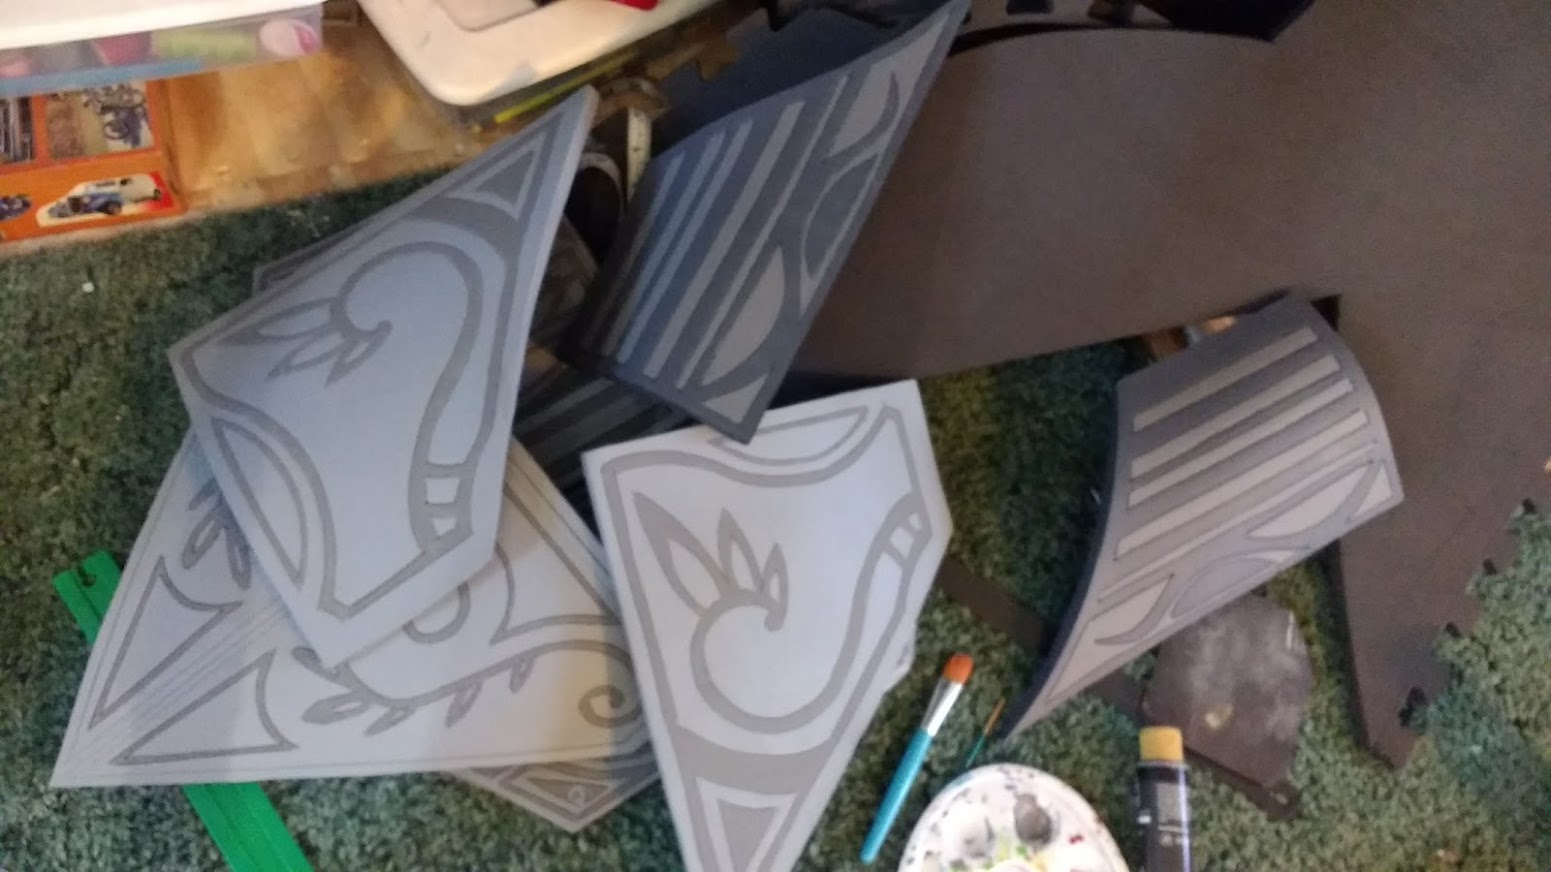
The final part of the hammer was all the foam pieces to build up the layered parts. In the show, the hammer converts to a grenade launcher, but that was a bit much for us to tackle! However, with some good tips from Punished Props, we figured the best way to make the outer parts were to use 1/2″ thick EVA foam floor mats. Yes, the ones that interlock like puzzle pieces. We got a pack of them for about $20, and only used 3 of the 6 (and used one more for Nora’s armor). We measured every part just like we did for the rest, using GIMP and converting millimeters to inches. Beth cut the pieces out with a razor knife, and smoothed the edges with a sander- you can sand the foam with a belt sander! Just be careful, and take your time. You can seal the foam (and make the detail cuts “etch” in) with a plain electric clothes iron. We also curved the mats using the iron, and a hair dryer. After cutting/detailing, we painted them with Plasti-Dip spray paint. Two coats of Plasti-Dip did the trick.
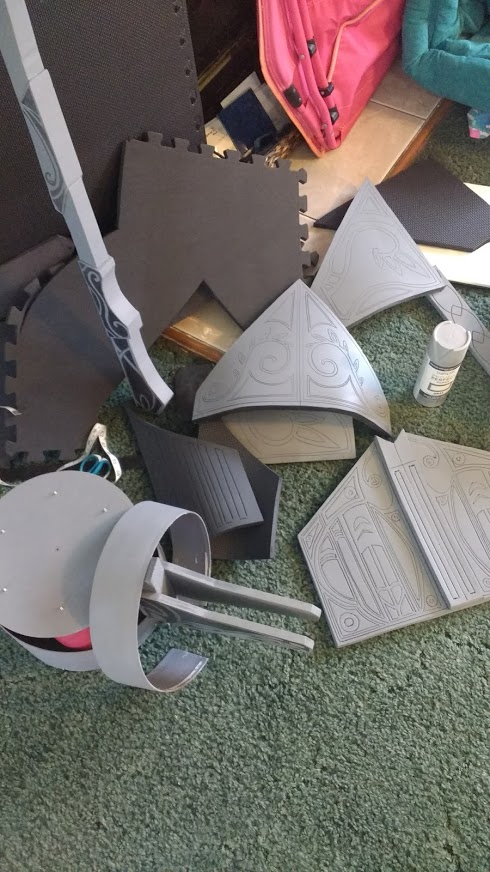
Here you can see the pieces cut out, and the details done also with the razor knife. After ironing, spray painting, and detail painting, we had this:
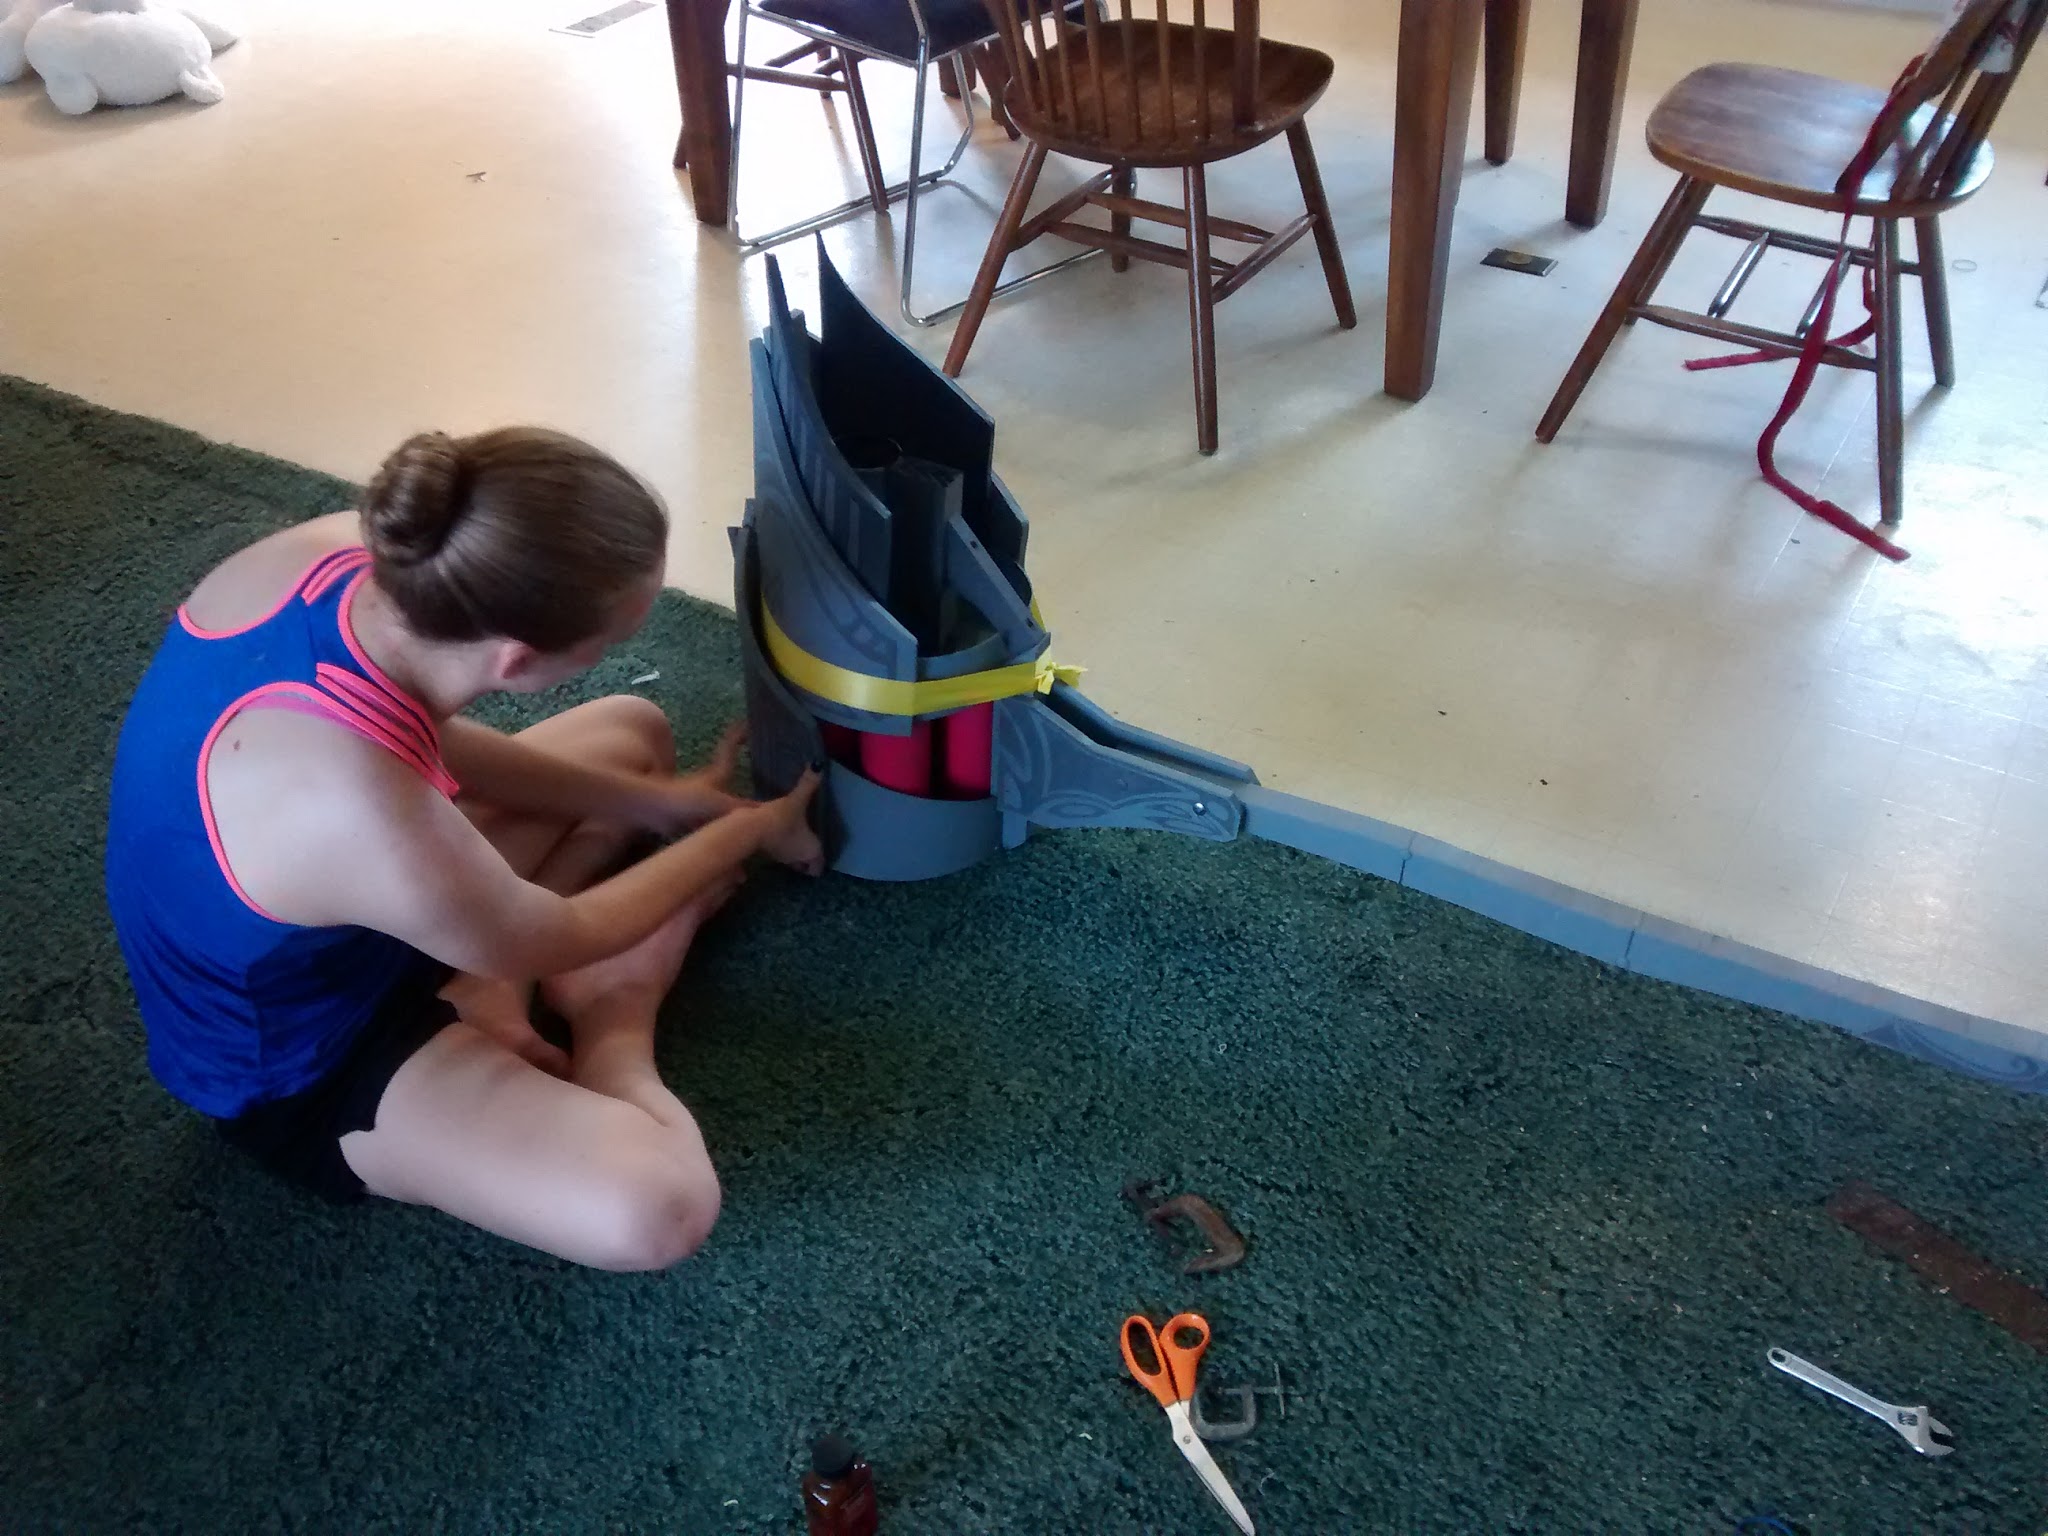
And then we had to glue the pieces onto the hammer’s head with contact cement. This wasn’t that hard, and Beth did all the gluing. The cement had to set for several hours before it was “con-proof” and I ended up putting a couple of tack nails in the corner of each piece, just to make sure they didn’t come loose. Beth tied the foam pieces with ribbons until the cement set. The very back tail piece needed a lot of heating and curving, as it was a very tight roll! But leaving it in the sun while rolled up and tied helped it keep its shape.
If you look closely, you can see the cement and tack nails holding the foam on. It’s not very noticeable unless you’re looking at it up close. And of course, you can see the touch-up paint and floor mat texture on the inside. But you know, it’s pretty close! Not bad for our first try.
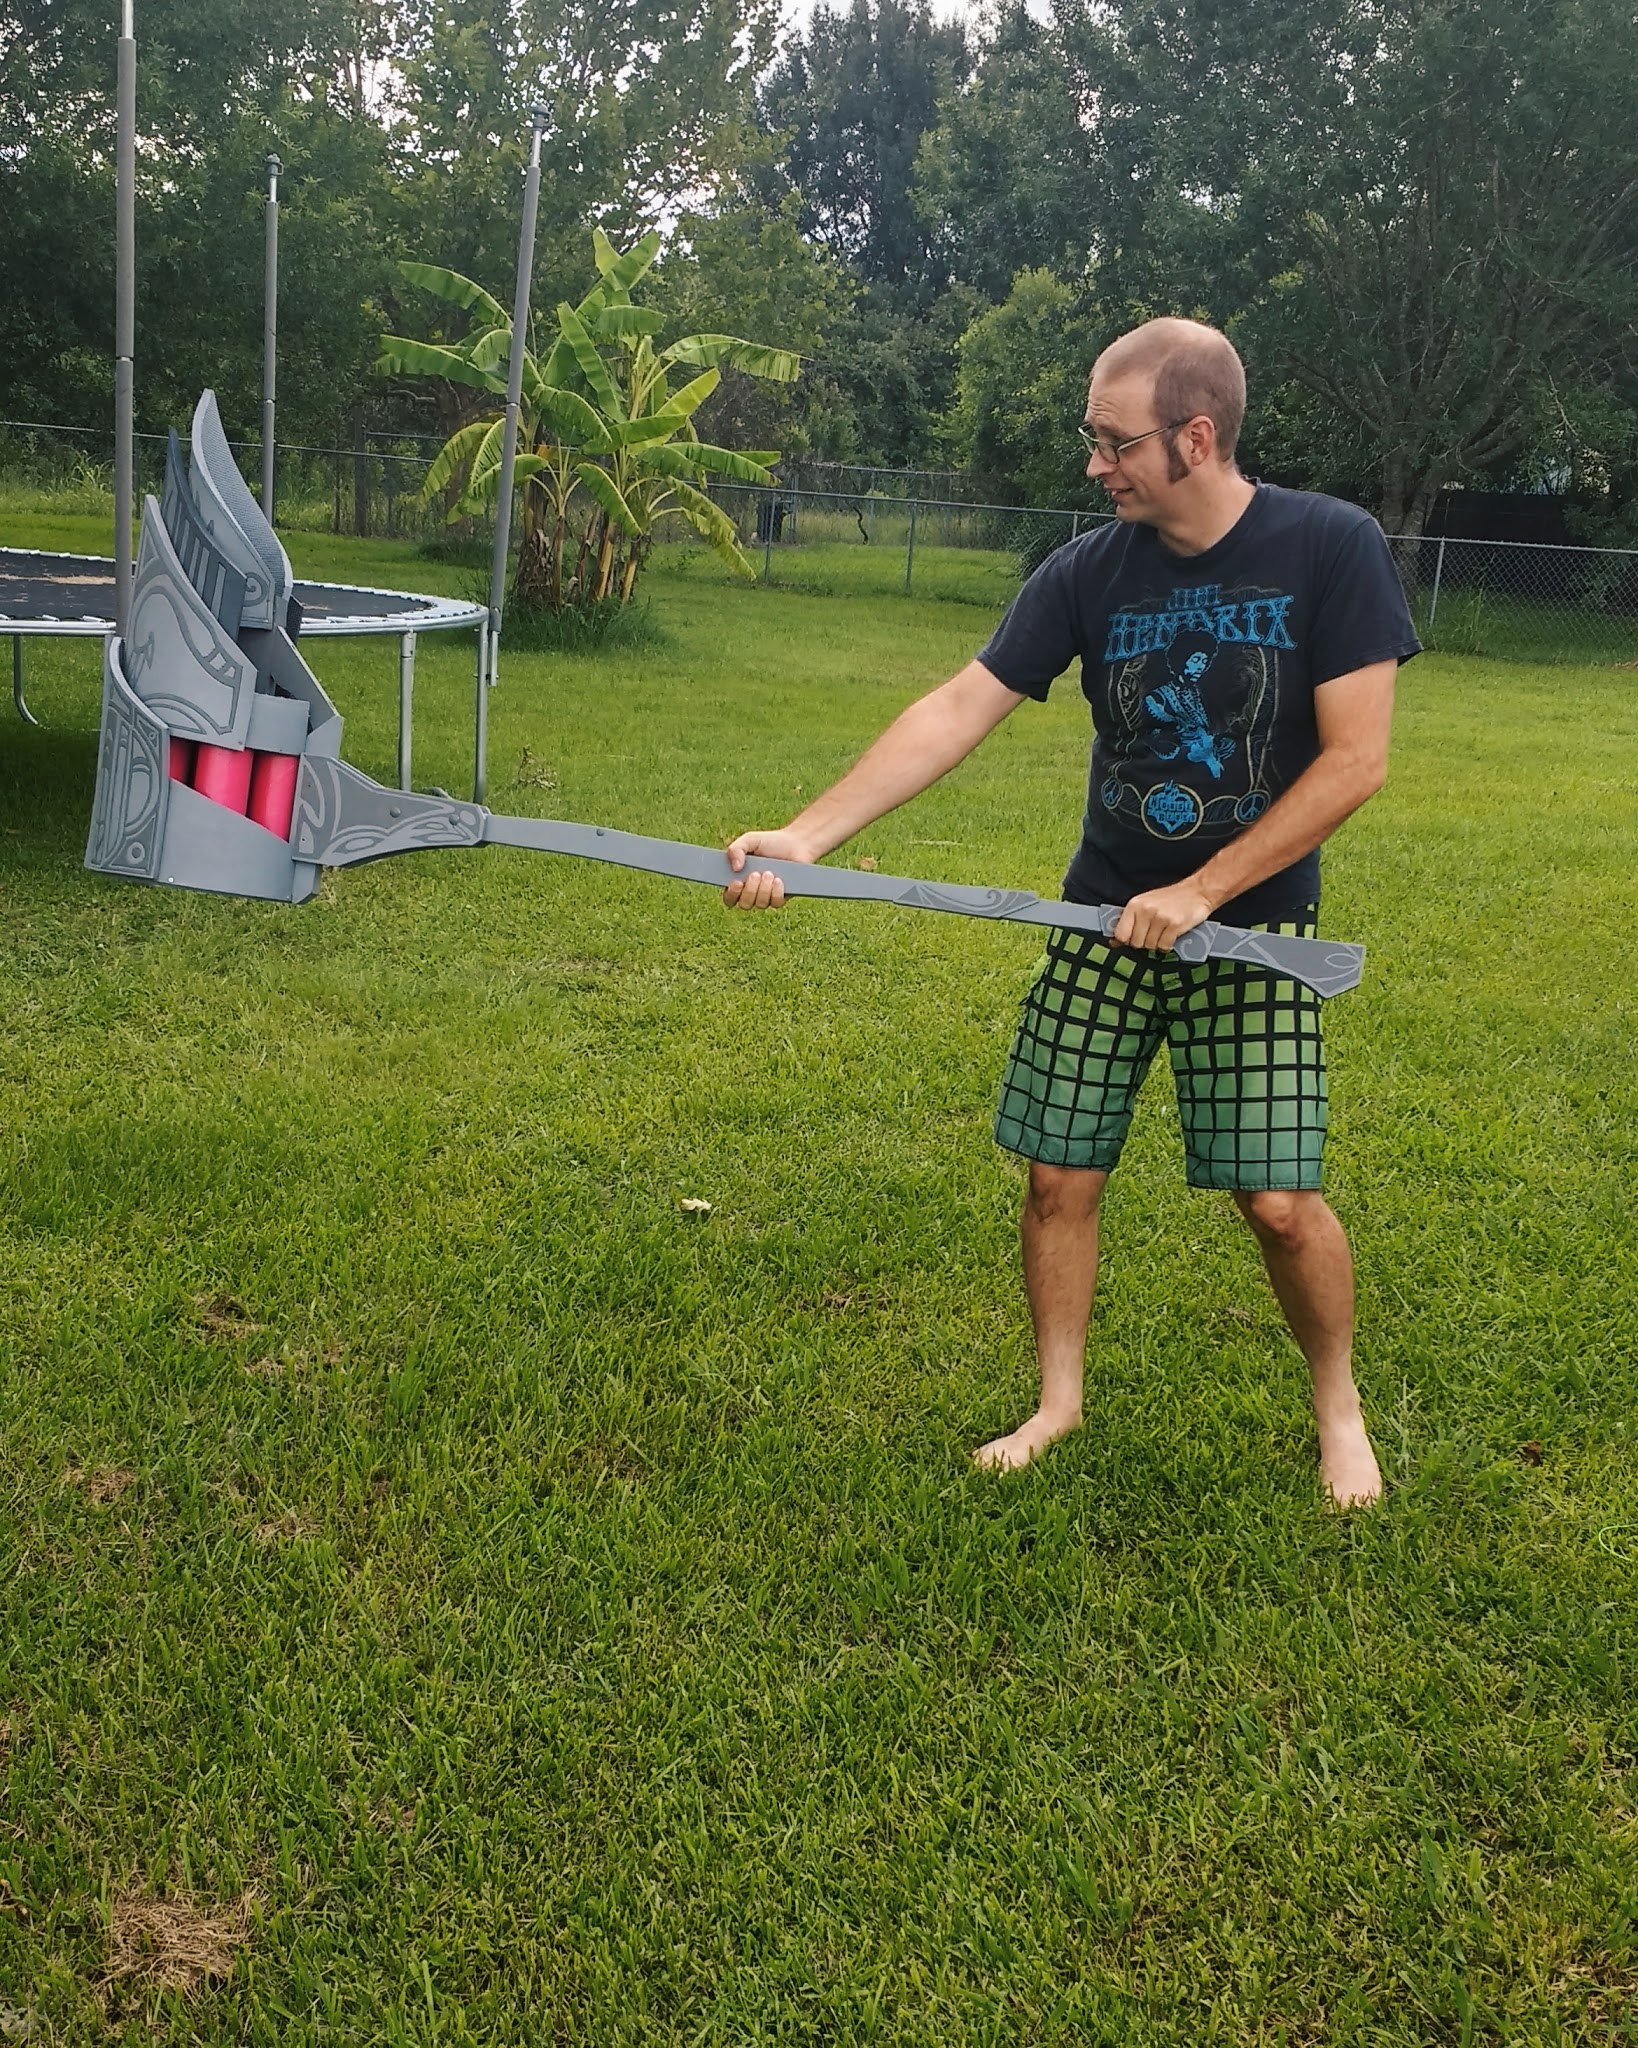
And the finished product:

Compared to the original:
And of course, I had to give it a swing or two. It’s solid! It weighs around 12 pounds. Center of gravity is where the handle and head plates connect.